Setting up Ubuntu 20.04 with Regolith
I’ve been using Ubuntu since its virst version, Ubuntu 4.10. I tried other distributions (Fedora, Debian, Gentoo, etc.), but always ended up back in Ubuntu. It’s stable enough, easy to install, and things just work, so I don’t see a reason to change. All my servers are either Ubuntu or Debian as well, so the knowledge translates well.
Anyway, I was still running Ubuntu 16.04, and over the years it accumulated some quirks. Like that it never did shut down completely, I had to run halt and, after giving it some time to stop what it was able to, I would hodl the power button for a few seconds to finally turn it off. Or that it threw an error and asked me if I wanted to send a report to Canonical every time I loaded GNOME.
It’s like a house that’s getting old. First the door won’t lock unless you push it in a certain way, then the cupboard won’t close perfectly, suddenly you’re fixing a pipe somewhere. You can’t stop the entropy, things have a natural tendency towards chaos. You either fix things as they appear, or end up with so many tiny things that it’s a struggle for someone else to enter your house. “Damn this key. It doesn’t turn! What did Vitor say… Wiggle to the lower left, pull the door and turn?”.
That was my notebook. It was time for an upgrade.
Ubuntu 20.04 was just released and the reviews were great. I heard they have been competing closely with Fedora on who’s the fastest, and apparently Ubuntu won slightly. Not enough to make a difference, but still… It’s good to know they’ve been paying attention.
0. Back up the previous install
I wanted a fresh install, so I needed to back up my files. It was easy, just plug in an external HD with enough space, and run:
sudo rsync -aPv /home/vitor/ /media/hd/backup-vitor-20200419
After a few hours, I’d have my home folder backed up and ready to go. As there wasn’t anything outside my home folder I cared about, this was enough.
I thought about generating a list with my installed packages (see this answer to know how), but I don’t need many packages, so I decided not to. I’ll install what I need, as I need it.
1. Install Ubuntu
The installation is straightforward. Just head to https://ubuntu.com, download the Ubuntu Desktop 20.04 and create a bootable pendrive. Then plug it in the USB port, reboot and launch Ubuntu.
I used to manually configure my partition sizes, but not anymore. I just follow the default install, only making sure that it enables hard drive encryption. As the hard drive is encrypted, I configure it to login automatically, because if you don’t have the HD’s encryption password, you won’t be able to power the computer on anyway, so adding my user’s password feels unnecessary.
A few minutes later, the installation is done and I can reboot into a fresh Ubuntu install.
2. Restore the backup
Plug in the external HD and run:
rsync -avz \
    --exclude '.tox' \
    --exclude 'node_modules' \
    --exclude 'Dropbox/' \
    --exclude '.cache' \
    --exclude '.config' \
    --exclude '.local' \
    --info=progress2 \
    /media/hd/My\ Passport/backup-vitor-20200419 \
    /home/vitor
I ignored a few of the folders. In hindsight, those shouldn’t have been backed up in the first place, but now it’s too late. At least it’s easy to remove then.
In general, I try to avoid copying configuration files I haven’t customized, as I’d rather get the default configurations as I install the softwares. I also removed Node and Python dependency folders, as I can download them again.
After a few hours, this would restore everything in my home folder with a caveat. As my external HD is formatted with NTFS, it lost the file’s ownership information and permissions. To get them back into Ubuntu’s defaults, run:
sudo chown vitor:vitor -R /home/vitor
find /home/vitor -type d -exec chmod 755 {} +
find /home/vitor -type f -exec chmod 644 {} +
The first line will change the ownership of all files to my user. The second line will change the permissions for directories to be 755, and the last line will change the file’s permissions to 644.
Finally, we want to change the permissions of password files to be readable only by our user:
chmod 700 ~/.ssh
chmod 600 ~/.ssh/*
chmod 700 ~/.aws
chmod 600 ~/.aws/*
Hopefully I haven’t missed anything.
2. Install the i3wm windows manager with Regolith
Now comes the fun part, customizing! I’ve been using i3wm for a few years now. The main difference is that it’s a tiling window manager, which means that the programs I open take as much screen space as possible. They’re not the usual floating windows that you drag and drop around your screen.
For example, if I open Firefox and there’s nothing else opened, Firefox will occupy my whole screen, similar to when you maximize it. Then, if I open Spotify, Firefox will automatically resize. The screen will be split vertically, with Firefox on the left and Spotify on the right. This continues as I open other programs. There are shortcuts to change this arrangement, for example using horizontal instead of vertical splits, or mixing the two.
It’s quite strange at first, but after one hour or so it’s much better. The programs I open use the entire screen automatically, and I can rearrange the windows quicker than dragging them around and trying to fit them. I can do things like “split the screen vertically and keep VS Code on the left, and split the right side horizontally, keeping Firefox on the top and a Terminal on the bottom”. If you never tried it, I highly recommend giving it a chance.
To install i3wm, I’m using Regolith, which is a package that integrates i3wm well with Ubuntu. With it, you’re able to use Ubuntu’s system admin tools, network manager, etc., which is very helpful. The installation is straightforward:
sudo add-apt-repository ppa:regolith-linux/release
sudo apt install regolith-desktop i3xrocks-net-traffic i3xrocks-cpu-usage i3xrocks-time
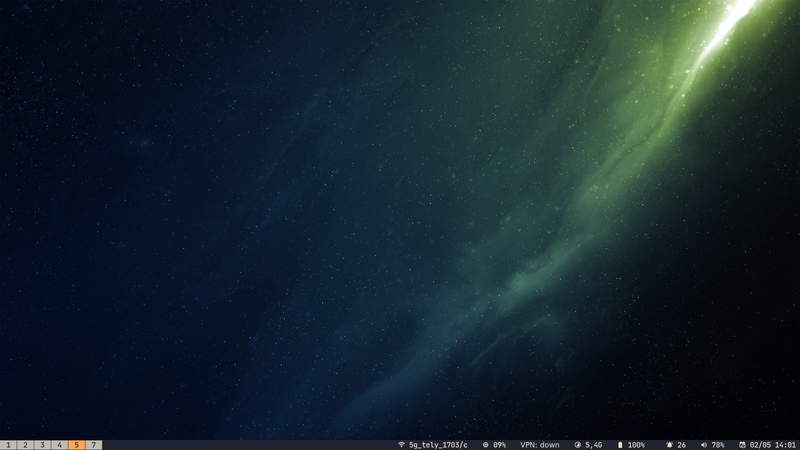
The regolith-desktop package contains the base Regolith distribution, and the i3xrocks-* packages are plugins. You can see the available plugins by running apt-cache search i3xrocks. These are the ones I have installed:
ii  i3xrocks                                   1.3.2                                    amd64        i3blocks with Xresources and conf.d configuration
ii  i3xrocks-battery                           3.0.10                                   amd64        Blocklet to show battery status.
ii  i3xrocks-cpu-usage                         3.0.10                                   amd64        Blocklet to show CPU load.
ii  i3xrocks-memory                            3.0.10                                   amd64        Blocklet to show memory utilization.
ii  i3xrocks-net-traffic                       3.0.10                                   amd64        Blocklet to show network I/O status.
ii  i3xrocks-openvpn                           3.0.10                                   amd64        Blocklet to show openvpn status.
ii  i3xrocks-time                              3.0.10                                   amd64        Blocklet to show date and time.
ii  i3xrocks-volume                            3.0.10                                   amd64        Blocklet to show volume.
ii  i3xrocks-wifi                              3.0.10                                   amd64        Blocklet to WiFi router name.
3. Final touches
Finally, I just need to configure the focus to follow the mouse, so I can interact with a window just by hovering my mouse over it, and add a couple programs in autostart.
The way I used to do this was by copying the default Regolith’s i3 file and tweaking the parameters I wanted. This works, but then I have to maintain the i3 config file myself, even if a new Regolith version updates it. To avoid this burden, Regolith allow tweaking the default configurations by changing variables. We can define them in the file ~/.Xresources-regolith as:
wm.gaps.inner.size: 0
wm.gaps.focus_follows_mouse: yes
wm.program.1: rescuetime
wm.program.2: setxkbmap -option ctrl:nocaps
After reloading Regolith by running regolith-look refresh, the changes will
be applied. You can check all variables available by looking in the
/etc/regolith/i3/config file. The variables look like
$i3-wm.gaps.focus_follows_mouse.
Thanks for this tip, Chris!
Conclusion
That’s it! Now I have a fresh Ubuntu install with a well-configured i3wm. Everything is working, it’s fast, and it’s beautiful. I can now install the rest of the softwares I need to work like Python, VS Code, Docker, etc. This install should serve me well for the next few years.